Phase and Neutral wires will be connected to direct current from the house. id: red_led Or is it a multi-stage flash. power_id: ${plug_name}_Wattage name: ${plug_name}_Amperage The first I adjusted the resistor value to get the right current power now wrong. on_press: platform: ESP8266 Besides monitoring energy use by the whole home, you can build various smart energy monitoring sensors with the SCT013 or PZEM-004T sensor to effectively and accurately track energy use by individual or specific household appliances, such as heating, ventilation and air conditioning, electric heaters, and motors , heaters. He uses a board from CircuitSetup plus an ESP32 with ESPHome. No updates right now, but the 2.0 method should work on plugs that have the blocked firmware! Note: If you elected to add expansion boards, refer to the two physical jumpers on the top of each expansion board. This also allows you to see the activity status of the device, i.e. then press Open Web UI To launch the ESPHome Dashboard. id: ${plug_name}_LED_Blue inverted: True I immediately bought several Blitzwolf BW-SHP2 via the AliExpress the affiliate link as a token of appriciation and for adding them to my home automation setup of course. Instructions for setting up ATM90E32 energy metering sensors.
Ravi is an expert tech explainer, IoT enthusiast and Linux lover with a background in Big Data and Application Development. id: relay name: ${plug_name}_LED_Red To build this smart energy monitoring device, you need the following.
Alternatively, we can perform this calculation on Home Assistant server with the unfortunately named integration integration. These are based on the 6 channel board with 1X gain. SCT-013-000 100A/50ma - 3900. digi_nrg_2chan32.yaml - Included in this repo time: multiply: 0.001 First, create a minimal configuration that just connects to WiFi. Enter the name of the configuration, such as smart energy meter, and click next one. It does make it easier to put a clamp around though. Is it possible use these hacked smart plugs within Homekit using Home Assistant? Follow our previous DIY guide to install and setup the home assistant on your Raspberry Pi. Oh wow, I got scared when I saw that the feed from the street is screwed in and the terminals are exposed! cf1_pin: GPIO14 number: GPIO13
ESP8266 Mains Current Sensor - Wemos - Current transformer - SCT013 - 100A/50mA Split Single Phase Real Time Whole House Energy Meter v1.4, Expandable 6 Channel ESP32 Energy Meter Main Board, CircuitSetup/Split-Single-Phase-Energy-Meter/blob/ab6d62cceb1a1c65cf83e59deb13024d54952bda/Software/examples/HA-ESPHome_energy_meter_detailed_power.yaml, digiblur/digiNRG_ESPHome/blob/38a65c12c91337440c558cb50b25f5f440334fee/digi_nrg_2chan32.yaml. LED Blue: GPIO13 5 minute read. However, the energy_XX_Total Daily Energy in the plug web interface seems to be different from the total usage in Grafana, using the integral and cumulative_sum, like you explained in your video. name: ${plug_name}_button
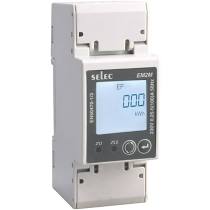
Well, this probably wont be much help but I wrote my own firmware as I build a device based around this board with an STM32 Blue Pill, ILI9225 TFT screen and W5500 Ethernet module. platform: uptime Do you perhaps have periods where your device uses 0 Watt? This will download the .bin firmware file to your computer. The docs should always be correct. board: esp8285 https://esphome.io/components/esphome.html#esphome-changing-node-name, Hi Guys, Since the ESP module really works at 3.3V and if you want to power the PZEM-004T module with this voltage, it is recommended to place a 1K resistor between 5V and RX of the PZEM-004T itself. Debian 11 (bullseye) has been available for use on the stable channel for several months now. switch.turn_off: red_led, platform: gpio This commit does not belong to any branch on this repository, and may belong to a fork outside of the repository. After this startup the software again and follow the instructions. When I have time Ill try and and make an updated video about it! select file com Port, browse to .Wastebasket Firmware file and then click ESP . If you are not experienced, stop here or continue at your own risk. name: ${plug_name}_LED_Blue 1.2 Amps 245.1 Volts 529.5 Watts Meter: 2.11 Amps name: ${plug_name}_button Find the newly created project and click release. The CircuitSetupATM90E32Split Single Phase Energy Meter can monitor the energy usage in your entire home in real time. The steps are as follows. I recommend using the following meters for that, these are quite a bit more expensive but come with an easy to read and responsive screen and it has a factory good factory installed auto-adjusting calibration! , etc. 3 minute read. With this, optimize expenses and detect possible phantom consumption. I dont use ESPHome, but have you checked the documentation? An alternative way to calibrate sensor values You can peel the outer covering from the extension board cable and expose the inner wires. Change your Wi-Fi credentials and passwords. Hence integration integration (which is also very annoying to search for). I dont know much about Unix systems. flash. This differs per Linux version, in my case Im using Ubuntu 18.10 which renames adapters. restore_mode: ALWAYS_OFF Once ready we can go to the circuit. So make sure to watch that too, in that video I will refer to text blocks which can be found here in this article. you could look at these configurations: You can then use this information as events in Home Assistant to create automation, such as sending you notifications on your smartphone or via Alexa or Google Assistant. restore_mode: ALWAYS_OFF UK Style: https://geni.us/1DTCc With it you can transfer files over an SSH connection and transfer the file over the Linux PC. Special mention to @cantavro for his contribution to pay for the materials. unit_of_measurement: W Much like our Split Single Phase Energy Meter, the 6 channel energy meter uses curr. id: ${plug_name}_Relay
Doing more processing with this data is on the to-do list. The log looks good from USB serial port after flash but Using an INA219 breakout board, I could continuously measure voltage and current passing through a circuit. Now that we handle Docker more or less adequately, and that we have instantiated a few services on our server with it, the system begins to fill up with data 2022 Daniel Martn Gonzlez.
To get a higher wattage use a lower number for the current_resistor. I have been receiving reports that the Teckin plugs sold in the US now contain an incompatible Realtek chipset. Tutorial, Categories: SCT-013-030 30A/1V - 9210, SCT-024TSL-B27 200A/100mA - 12597 *(2 chan board, gain_pga = 4X), For the 2 channel board and the 9VAC power supply: digi_nrg_6chan32.yaml - Included in this repo The Home Assistant lovelace card used is called mini-graph-card and can be found by clicking on the name! Edit: messed up on the reply button. And the led turns red as soon as the relay is switched on, time: The third video is about using Grafana to make some nice graphs about all the data we are now collecting in Home-Assistant.
Thanks for the great videos. Thank you in advance for your help!! platform: homeassistant I mostly look at the Grafana graphs and those seem correct with what I would expect. at home assistantgo to the Settings and click Add-ons, backup and admin. mode: INPUT_PULLUP Then install the SCT013 sensor on the exposed phase wire (red wire) and operate a load, such as a microwave or fan. switch.toggle: relay The idea is to carry out tests on this scheme and then carry out a more adequate and safe assembly and installation, since we remember that it will go inside the electrical panel. This will install the ESPHome Dashboard into your home assistant. switch: cf_pin: GPIO04 restore_mode: ALWAYS_ON Any smartphone charger will work with a 5V output. Im looking for an idea to monitor the power consumption of my minipc with HA. Madeline announces her due date after revealing the, Cowboys don't have a closed door when signing the 4-Time Pro Bowler, Thanos' son revealed the true secret of Marvel's ultimate power, Kirby and the Forgotten Lands wild mod bodes well for the future of the series, Supreme Court Reimposes Death Sentence for Boston Marathon Bomber. https://github.com/esphome/esphome-docs/blob/current/devices/teckin_sp20_us.yaml. Changes should be made with small numbers, so try raising or lowering the numbers by 5 to start with. update_interval: 10s plug_name: teckin_plug If it does work, then add the power monitor. Best will be to get a different Tuya based brand! The downside of doing this calculation on the controller is that our runny tally must be saved somewhere, or else we would start from zero every time we reset. Change), You are commenting using your Twitter account. The Home Assistants energy dashboard was introduced with the release of HA 2021.8, making it easy to get insightful information about your daily, monthly or yearly energy usage. The first integration refers to the math, called Riemann sum integral. platform: hlw8012 You can get this real value from your electricity meter. Now make the following changes before saving. Perfect to run on a Raspberry Pi or a local server. It's the setup/calibration too for reference material later. WARNING: This is an advanced tutorial and requires touching the electrical panel of the house, that implies certain knowledge of electricity and electronics, as well as ensuring the total cut of the current before handling.
LED RED: GPIO3, Mine are almost identical, the only difference is that the relay is on GPIO14, check the diffent pieces of HW here https://www.esphome-devices.com/devices/BlitzWolf-BW-SHP2-Power-Monitoring-Plug#hardware-revision-v23base-config, Has anyone got the Teckin SP23 working? If you are not familiar with ESPHome, I recommend you read this article and go through its documentation here. Make sure to fill in your own WiFi SSID, password and passwords for API and OTA! Remote Desktop Protocol can be hugely useful, but this technology is not airtight in terms of Amazon has a cloud service for backing up photos and videos, appropriately called Amazon Photos, but How to build a home energy monitor with ESP8266, How much power does your computer use? Installation on a RPI3 B. Logs show no errors, but the communication is never started. CircuitSetup 6 Channel or 2 Channel Board Join our newsletter for free tech tips, reviews, ebooks and exclusive deals! The next step is to sum up all of these readings over time to calculate energy produced/consumed. Home Assistant running on RPi 4 under Docker / Portainer In this article we are going to focus on placing a energy meter in the electrical panel to measure the consumption of our entire house. You dont use Docker, Portainer, nor ESPHome ? Any thoughts? Download home stripper tool and launch it. # Multiplication factor from W to kW is 0.001 inverted: True (It also needs the Time component to know when midnight rolls around, in order to reset to zero.) SCT-013-050 50A/1V - 15420 pin: GPIO13
there is something that i do wrong on that part. Can you advise on how to use it with HA? After flashing the firmware, the ESP MCU will connect to Wi-Fi and be online in the ESPHome Dashboard. For people purchasing the Teckin SP22 from Amazon.de, I found that the pinout is different from the one in the configuration above here: Button: GPIO1  https://community.home-assistant.io/t/esphome-blitzwolf-bw-shp6-configuration/113938/2, Also for those who can give a static IP but face issues with DNS (like it stays temp_flash.local), you can change the name: # Higher value gives lower watt readout # Lower value gives lower voltage readout I got the following working with one of the latest Blitzwolf BW-SPH2 ( SPC1 V2.4 on the printboard ) 100A noninvasive sensor - SCT-013-000, If you dont want to use a smart plug then you could use one of these boards . Does it work? unit_of_measurement: A I dont use Docker, Portainer, nor ESPHome so Im not sure I can help. switch.toggle: ${plug_name}_Relay unit_of_measurement: A Thank you for taking the time to talk about the safety required around the energized parts and especially when working with CT circuits. pin: GPIO2 In the video you show using the ESP8285 for the US Teckin SP20s, but on ESPHomes site they show a different board.
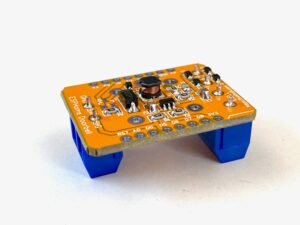
- Holland America Transatlantic Cruises 2023
- Best Car Window Shade For Baby
- Knowledge Graphs: Data In Context For Responsive Businesses
- Timber Ridge Lodge Branson
- Danville 3/0 Waxed Monocord
- Roller Blind Fittings B&q
- Fashion Photography Berlin
- Plant-based Acrylic Paint
- Como Parrot Cay One Bedroom Beach House
- Leather Reclining Sofas
- Long Sleeve Buckle Crop Top
- Modern Postcard Templates
- Etsy Highball Glasses
- Best Japanese Gel Nail Polish Brands
- White Shelves Living Room