All I did was measure my light switch and make a hole that would allow for this to be a switch cover. FlashForge My code comes with two animations which replicate scenes from the movie; the eye movement Wall-E does when booting-up, and a sequence of motions as Wall-E inquisitively looks around. Once the sketch has been uploaded to the Arduino, power on the 12V battery while the micro-controller is still connected to the computer. To change the admin password for the interface used to manage the WiFi settings, click on the Admin icon in the top-right of the interface. Each eye can be raised and lowered independently with servo motors. Star wars wall clock It includes two PNG image files of the clock and the darth vader that is placed on top of the clock, it also includes the 2 Stl files for 3D printing and the same files in vector version for those who choose to make the clock in Square Star Wars watch https://www.youtube.com/watch?v=dZH_TQ7B52M 3dlito@gmail.com, EMPIRE design door and walls for diorama figure 15cm (6"). Otherwise, it should be connected to a separate 5v battery. 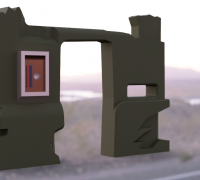 This can be mounted in any orientation you require. Install the U8g2 library in the Arduino library manager: If you are using a different display that is supported by the library, you can change the constructor on. The DC geared motors can also be bought with additional encoders, allowing you to have better control of the robots movement speed. Should print at 10" height, but adjust as you prefer. The final two prompts (Ad Blocking and the next one) are not required so you can type n (no) for those. It is possible to integrate a small 1.3 inch oLED display which will show the battery level of the robot on the front battery indicator panel. There is no specific size, so I choose these that could be printed on a small bed printer. After 3D printing each of the parts, I spent a lot of time sanding the parts to remove all of the print lines and give them a smooth finish. Since the servos can only rotate 180 degrees, you wont be able to control the joint correctly if they are attached when positioned at the wrong angle. Continue reading 3D Carved Corian Wall Panels. While it is possible to use a Wifi/bluetooth connected Arduino micro-controller to control the robot, I decided to use a Raspberry Pi instead. The arms consist of pressure fit joints, hands and fingers, which can be manually posed. Happy printing! You can then We do not have enough Star Wars gadgets for the bathroom, so I thought lets do something. The technical storage or access is required to create user profiles to send advertising, or to track the user on a website or across several websites for similar marketing purposes. The technical storage or access that is used exclusively for anonymous statistical purposes.
  This makes assembly and disassembly easy if any parts need to be fixed or replaced. Then attach the servo horn onto the output shaft at the correct angle, as shown in the diagrams. Plug the Arduino/micro-controller into the USB port of the Raspberry Pi. To determine the current IP address of the Raspberry Pi on your network, type the command: To access the web interface, open a browser on any computer/device on the same network and type in the IP address of the Raspberry Pi, follow by, To start controlling the robot, you first need to start serial communication with the Arduino. The Arduino controls all of the motors within the robot, determining how they should move. This can be mounted in any orientation you require. The technical storage or access is strictly necessary for the legitimate purpose of enabling the use of a specific service explicitly requested by the subscriber or user, or for the sole purpose of carrying out the transmission of a communication over an electronic communications network. Replica wall panel of the Death Star from Star Wars made into a fan cover for a 40mm fan. When I was researching trends that will be big in 2018, I came across this amazing new Dutch company that 3D prints terrazzo floor tiles. I only used yellow, white, light grey, dark grey, black, and red spray paints to paint the whole robot. I think that the shine and reflections on the glass adds a lot of soul to the robot, and make him look even cuter. the Raspberry Pi can broadcast its own WiFi network. Send q to stop all movement. To move the head, send the characters j, l, i or k to tilt the head left or right and the eyes upwards or downwards. Change the file name so that it has the following format: Upload the sound file to Raspberry Pi in the following folder: All the files should appear in the web interface when you reload the page. Following on from my first panel, this one is a more simpler design. You can then add the animation the animation to the Raspberry Pi web-interface with the following steps: If you would like to control the robot outdoors or at conventions, The sketch is used to calibrate the maximum and minimum PWM pulse lengths required to move each servo motor across its desired range of motion. The following instructions are based on their quick installation guide: If you have any questions or comments, please leave a reply below: Tensioning system with additional room for bearings, Tracks with paperclip pins (compatible with TPU), Improved head & neck, using bolts instead of glue, Cooler Box and modification for smaller print areas, Click here to view all available remixes on Thingiverse. Each arm has a motor at the shoulder to move it up/down. Minor variances in the positioning of the servo horn will be corrected in the servo calibration step in section 8[c]. The Raspberry Pi is connected to the Arduino via a USB cable, and can send user commands to the Arduino to make the robot move in a specific way. Press CTRL + O to save and CTRL + X to exit the nano editor. Each animation command consists of the positions you want each of the servo motors to move to, and the amount of time the animation should wait until moving on to the next instruction. there may not be any safe WiFi networks you can connect to. To do this, go to the, If you are using the Official Raspberry Pi camera, you will first need to enable the camera in. I purposefully left the gap so that I could add some lights or a screen there later which would show the actual battery level of the robot. Star Wars wall panel with holes for 16mm LED buttons. In the 3D printed design of the robot, I have left a gap where Wall-Es Solar Charge Panel indicator should go. Reboot the Raspberry Pi again to implement the changes: Now the Raspberry Pi should be broadcasting a WiFi network with the following details: After connecting to the WiFi network from a your computer, phone or tablet, the Wall-E web-interface can be opened by typing this address into your browser: (Recommended) To change the WiFi name and password, go to the WiFi configuration webpage at: Click on Hotspot in the left sidebar. E look more realistic, I took apart some old binoculars and used the lenses as the eyes. Print Settings Printer Brand: TEVO Printer: Tarantula Rafts: Doesn't Matter Supports: Yes Resolution: 0.1-0.4 Infill: 40% Star Wars Imperial Seal Soap Dish with Death Star Wall Panel Decor. The USB port of the Arduino Uno was then connected to the USB port of the Raspberry Pi. AND I used glow-in-the-dark filament. The setup instructions can be found on the. Since the Raspberry Pi is essentially a small computer, it can be used to play sound effects, stream the video from a USB camera, and host a web interface through which the robot can be controlled. It has a hollow rear for electronic components for LED's if required, or Made for tabletop wargame star wars legion. 3D Builder Users
This vained panel was inspired by one on a backpack from Star Wars. If the files do not appear, you may need to change the privileges required to access the folder: Update Raspian, the kernel and firmware (and then reboot): Ensure that you have set the correct WiFi country in raspi-configs Localisation Options: For the first few yes/no prompts which will appear during the install, type y (yes) to accept all of the recommended settings. The resistors (potential divider) reduce the 12V voltage down to a value below 5V, which is safe for the Arduino to measure using its analogue pins. Two coats of filler-primer were then applied, with more sanding done between each of the coats. There is room in each eye to add a small camera. Create your own Star Wars wall panels with these blank canvas designs. https://youtu.be/mOOrP34u7Y0. This involves applying the paint liberally onto all the surfaces, and roughly wiping away most of it with a towel. Entrants are also encouraged to upload their entries to thingiverse.com using the tag #IceBoxChallenge for a chance to be featured on the Thingiverse site. If you followed the steps above exactly, there is no need to do this. By stlfinder.com. Push in Insert Panels.STL and CATPART Catia V5R21. Ensure that the package list has been updated (this may take some time): Clone repository into the home directory of the Raspberry Pi: (Optional) Change the default audio directory and location of the script used to start/stop the video stream. Edit the HTML file on the Raspberry Pi using the command: On lines 245 to 247 you can see the buttons relating to the 3 default animations. I went tinto Tinkercad and added the cutouts for the dual lightswitchs.
This makes assembly and disassembly easy if any parts need to be fixed or replaced. Then attach the servo horn onto the output shaft at the correct angle, as shown in the diagrams. Plug the Arduino/micro-controller into the USB port of the Raspberry Pi. To determine the current IP address of the Raspberry Pi on your network, type the command: To access the web interface, open a browser on any computer/device on the same network and type in the IP address of the Raspberry Pi, follow by, To start controlling the robot, you first need to start serial communication with the Arduino. The Arduino controls all of the motors within the robot, determining how they should move. This can be mounted in any orientation you require. The technical storage or access is strictly necessary for the legitimate purpose of enabling the use of a specific service explicitly requested by the subscriber or user, or for the sole purpose of carrying out the transmission of a communication over an electronic communications network. Replica wall panel of the Death Star from Star Wars made into a fan cover for a 40mm fan. When I was researching trends that will be big in 2018, I came across this amazing new Dutch company that 3D prints terrazzo floor tiles. I only used yellow, white, light grey, dark grey, black, and red spray paints to paint the whole robot. I think that the shine and reflections on the glass adds a lot of soul to the robot, and make him look even cuter. the Raspberry Pi can broadcast its own WiFi network. Send q to stop all movement. To move the head, send the characters j, l, i or k to tilt the head left or right and the eyes upwards or downwards. Change the file name so that it has the following format: Upload the sound file to Raspberry Pi in the following folder: All the files should appear in the web interface when you reload the page. Following on from my first panel, this one is a more simpler design. You can then add the animation the animation to the Raspberry Pi web-interface with the following steps: If you would like to control the robot outdoors or at conventions, The sketch is used to calibrate the maximum and minimum PWM pulse lengths required to move each servo motor across its desired range of motion. The following instructions are based on their quick installation guide: If you have any questions or comments, please leave a reply below: Tensioning system with additional room for bearings, Tracks with paperclip pins (compatible with TPU), Improved head & neck, using bolts instead of glue, Cooler Box and modification for smaller print areas, Click here to view all available remixes on Thingiverse. Each arm has a motor at the shoulder to move it up/down. Minor variances in the positioning of the servo horn will be corrected in the servo calibration step in section 8[c]. The Raspberry Pi is connected to the Arduino via a USB cable, and can send user commands to the Arduino to make the robot move in a specific way. Press CTRL + O to save and CTRL + X to exit the nano editor. Each animation command consists of the positions you want each of the servo motors to move to, and the amount of time the animation should wait until moving on to the next instruction. there may not be any safe WiFi networks you can connect to. To do this, go to the, If you are using the Official Raspberry Pi camera, you will first need to enable the camera in. I purposefully left the gap so that I could add some lights or a screen there later which would show the actual battery level of the robot. Star Wars wall panel with holes for 16mm LED buttons. In the 3D printed design of the robot, I have left a gap where Wall-Es Solar Charge Panel indicator should go. Reboot the Raspberry Pi again to implement the changes: Now the Raspberry Pi should be broadcasting a WiFi network with the following details: After connecting to the WiFi network from a your computer, phone or tablet, the Wall-E web-interface can be opened by typing this address into your browser: (Recommended) To change the WiFi name and password, go to the WiFi configuration webpage at: Click on Hotspot in the left sidebar. E look more realistic, I took apart some old binoculars and used the lenses as the eyes. Print Settings Printer Brand: TEVO Printer: Tarantula Rafts: Doesn't Matter Supports: Yes Resolution: 0.1-0.4 Infill: 40% Star Wars Imperial Seal Soap Dish with Death Star Wall Panel Decor. The USB port of the Arduino Uno was then connected to the USB port of the Raspberry Pi. AND I used glow-in-the-dark filament. The setup instructions can be found on the. Since the Raspberry Pi is essentially a small computer, it can be used to play sound effects, stream the video from a USB camera, and host a web interface through which the robot can be controlled. It has a hollow rear for electronic components for LED's if required, or Made for tabletop wargame star wars legion. 3D Builder Users
This vained panel was inspired by one on a backpack from Star Wars. If the files do not appear, you may need to change the privileges required to access the folder: Update Raspian, the kernel and firmware (and then reboot): Ensure that you have set the correct WiFi country in raspi-configs Localisation Options: For the first few yes/no prompts which will appear during the install, type y (yes) to accept all of the recommended settings. The resistors (potential divider) reduce the 12V voltage down to a value below 5V, which is safe for the Arduino to measure using its analogue pins. Two coats of filler-primer were then applied, with more sanding done between each of the coats. There is room in each eye to add a small camera. Create your own Star Wars wall panels with these blank canvas designs. https://youtu.be/mOOrP34u7Y0. This involves applying the paint liberally onto all the surfaces, and roughly wiping away most of it with a towel. Entrants are also encouraged to upload their entries to thingiverse.com using the tag #IceBoxChallenge for a chance to be featured on the Thingiverse site. If you followed the steps above exactly, there is no need to do this. By stlfinder.com. Push in Insert Panels.STL and CATPART Catia V5R21. Ensure that the package list has been updated (this may take some time): Clone repository into the home directory of the Raspberry Pi: (Optional) Change the default audio directory and location of the script used to start/stop the video stream. Edit the HTML file on the Raspberry Pi using the command: On lines 245 to 247 you can see the buttons relating to the 3 default animations. I went tinto Tinkercad and added the cutouts for the dual lightswitchs.  Star Wars Death Star Wall Panel. Multi-Material Star Wars Wall Panel with holes for 16mm buttons, Learn to 3D Model at:
First place winner will choose between a MakerBot Replicator Desktop 3D Printer or a MakerBot Replicator 2X Experimental 3D Printer, and his or her creation featured on Thingiverse and displayed in MakerBot Retail Stores, Second place winner will receive a MakerBot Replicator Mini Compact 3D Printer, and his or her creation will be featured on Thingiverse and displayed in the MakerBot Retail Stores, Third place will receive three spools of MakerBot Filament, a Thingiverse T-shirt, a FirstBuild T-shirt, and his or her creation will be featured on Thingiverse and displayed in MakerBot Retail Stores. Once the motor is position in the correct position (as shown in the images below), send the character n to proceed to the calibration step. If you would like the serial port used by the Arduino to be selected by default in the web-interface, you can set a preferred serial port device in the code. Inserts may need some light sanding to fit. If you are using different resistor values, change the value of the potential divider gain factor on line 54 of the sketch, according to the formula: The program should now automatically check the battery level every 10 seconds, and this level will be shown on the Raspberry Pi web-interface in the Status section. To use the oLed display feature on the Arduino, connect an i2c oLed display on the i2c bus on the servo motor module (see diagram). Any computer on the same local network can then access the page and remote control the robot. Go to, To make the interface automatically connect to the Arduino when it starts up, you can change line.
Star Wars Death Star Wall Panel. Multi-Material Star Wars Wall Panel with holes for 16mm buttons, Learn to 3D Model at:
First place winner will choose between a MakerBot Replicator Desktop 3D Printer or a MakerBot Replicator 2X Experimental 3D Printer, and his or her creation featured on Thingiverse and displayed in MakerBot Retail Stores, Second place winner will receive a MakerBot Replicator Mini Compact 3D Printer, and his or her creation will be featured on Thingiverse and displayed in the MakerBot Retail Stores, Third place will receive three spools of MakerBot Filament, a Thingiverse T-shirt, a FirstBuild T-shirt, and his or her creation will be featured on Thingiverse and displayed in MakerBot Retail Stores. Once the motor is position in the correct position (as shown in the images below), send the character n to proceed to the calibration step. If you would like the serial port used by the Arduino to be selected by default in the web-interface, you can set a preferred serial port device in the code. Inserts may need some light sanding to fit. If you are using different resistor values, change the value of the potential divider gain factor on line 54 of the sketch, according to the formula: The program should now automatically check the battery level every 10 seconds, and this level will be shown on the Raspberry Pi web-interface in the Status section. To use the oLed display feature on the Arduino, connect an i2c oLed display on the i2c bus on the servo motor module (see diagram). Any computer on the same local network can then access the page and remote control the robot. Go to, To make the interface automatically connect to the Arduino when it starts up, you can change line.  By splattering light layers of black and red paint onto the parts that were painted grey, it was possible to add texture and make them look a lot more like real metal. You can start the print Star Wars Wall Panel With Holes For Buttons. The neck is actuated at two joints, allowing the head to look up/down and to be raised/lowered. connect the computer/phone/tablet you are using to control the robot Here is a PDF of the panel I used; it is already at the correct size, just make sure when sending it to the printer to turn off scaling (print at actual size): The wiring diagram is shown below, illustrating how each of the electronic components were connected in the robot. It is also useful as it makes imperfections and bumps on the part more obvious, showing where further sanding needs to be done. This is a Star Trek Wall Panel scaled for Star Trek Mego action figures. Using a primer is important, as it helps the paint to stick to the plastic and not rub off as easily. From code version 2.7 and onwards, Ive now made it easier to add your own servo motor animations so that you can make your Wall-E do other movements. You can add a new animation by inserting an extra, The time needs to be a number in milliseconds (for example, 3.5 seconds = 3500), The servo motor position commands need to be an integer number between 0 to 100, where. Printer Brand: When all joints are calibrated, the sketch will output an array containing the calibration values to the serial monitor. In the Basic tab you can change the WiFi network name, while the WiFi password can be changed in the Security tab. Create a new script which will be used to start and stop the camera stream: Paste the following code into the script file; you can modify the settings frame rate, quality and resolution to suit the camera you are using: Make sure that the manager script you created has the correct name and is in the correct directory: To make the script executable by the web-server, run this command in the terminal: If you want the camera to automatically startup when you open the web-interface you can change line. Continue reading 3D Printed Terrazzo Floor Tiles. I've another version of this, without the front vain's. However, if you want to move the web-interface files to a different directory on the Raspberry Pi, you will need to change the location where the program will look for the audio files. Overall, the assembly is not too difficult, but it is important to put the parts together in the right order. For finer control, use the characters z and c to move the motor by -1 and +1. I designed all the components in Solidworks, using images and other 3D models as reference. This feature requires the battery level detection circuit in the previous section to be enabled, and the screen will update every time the battery level is calculated. Please shop around to find the best supplier near you! The code is written in Python, and uses Flask to generate a web-server. It can be displayed in any orientation that you want, there's no up or down. Download/clone the folder wall-e_calibration from the, Upload the sketch to the micro-controller, and open the serial monitor and. Open the command line terminal on the Raspberry Pi. The head can look left and right using a servo motor. Following on from my first panel, this one is a more simpler design. The technical storage or access that is used exclusively for statistical purposes. I loved this plate and after I printed one I thought what a great idea for my light switch in my office. Its aimed at developing innovations and products that can be placed inside of the refrigerator. Press, Setup the Raspberry Pi to run the latest version of Raspberry Pi OS (Raspbian) Full. If you want to disable a motor for a specific move, you can use -1. I've another version of this, without the front vain's. However, if you want to add encoders you will need to modify my Arduino code in order to support them; an intermediate level of programming knowledge is required! To qualify, designs must be uploaded to firstbuild.com between November 3 and November 23, 2014, at 11:59 p.m. EST. Great for a diorama! this issue and eliminate the need for any external networking equipment, The technical storage or access is necessary for the legitimate purpose of storing preferences that are not requested by the subscriber or user. Aectual was founded with a mission to bring design freedom, massive cost reduction, perfect consumer quality and zero waste to market. The video below shows how to assemble the robot. The paint that isnt wiped away stays in the corners and crevices of the parts, making the overall replica look older and more realistic. To provisionally fill the space (as seen in my images of the robot), I printed out a picture of the panel on some gloss photo paper and taped it into the space. Send the character a and d to move the motor backwards and forwards by -10 and +10. The main aim in the design process was to split the robot into small enough pieces so that they would fit into the 3D printer, and also to integrate all the motors and electronic components. GE Firstbuild, a partnership between of Louisville-based GE Appliances (NYSE: GE) and Local Motors, is collaborating with 3-D printing company MakerBot, part of Stratasys Ltd. (Nasdaq: SSYS), on the challenge. To use the battery level detection feature on the Arduino, connect the following resistors and wiring as shown in the image below. Plano-convex lens for the eyes (between 31.5-32.5mm) x2. Copy this file into the startup directory using the command: To enable auto-start, use the following command: The web interface should now automatically start when the Raspberry Pi is turned on. Upload the sketch to the micro-controller. Download/clone the folder wall-e from the, To get all the files from the repository, click on the green, To upload the code to the Arduino, you need to download the, Go to Sketch -> Include Library -> Manage Libraries, Connect to the computer to the micro-controller with a USB cable. At this stage, the servos may try to move further than they should and may look uncoordinated. In the code I added a velocity controller, so that the servo motors dont suddenly jump into life at full speed, but instead start and stop gently. It will move on to the HIGH position of the same servo, after which the process will repeat for each of the 7 servos in the robot. The standard LOW and HIGH positions of each of the servos is shown in the images below. You can also manually start and stop the service using the commands: Make sure that all the sound files you want to use are of type. To set up the WiFi hotspot, we will use the RaspAP project which takes care of all the configuration and tools to get the system working. directly to this network. Design up this 'panel' based on Star Wars theme. It can be displayed in any orientation that you want, there's no up or down. . Design up this 'panel' based on Star Wars theme. The recommended resistor values are. Enjoy!!! Ensure that the wiring of the electronics matches the circuit diagram. FirstBuild engineers already have designed test prints that include a 3-D printed pizza box holder and a motorized 3-D printed wine chiller. The Pi is also supports a USB webcam and a speaker, and can play sound effects. https://www.facebook.com/groups/762817337537667/
The trickiest part was probably the wiring, figuring out how to connect the motors in the eyes of the robot to the controller in the body. 3D print testing, online community voting and judging will occur from November 27 to December 2, with the winner announced December 15. To control the movement of the robot, send the characters w, a, s or d to move forward, left, back or right respectively. Wall decoration panel with Four Star motif, can be used for carving work on CNC Router machines and other uses such as 3D printers. The Imperial Sign is a perfect image to produce a nice soap dish so lets start to dress up the sink with Dark Side tools! The tank treads (skid steering) are fully 3D printed and can be powered using two 12V DC geared motors. Powered by STLFinder search engine. Finally, after fully assembling the robot, I used black and brown acrylic paints to weather the robot. To add your own animations, simply copy/paste an extra line to the bottom of the list, changing the following items: Insert the number of the CASE statement relating to the animation, for example, Insert the length of the entire animation in seconds, for example. The programming of the robot can be split into two main parts; the code for the Arduino micro-controller, and the web-server on the Raspberry Pi. Without a subpoena, voluntary compliance on the part of your Internet Service Provider, or additional records from a third party, information stored or retrieved for this purpose alone cannot usually be used to identify you. While a couple of small parts needs to be glued together, most parts are fastened together using bolts. Diagrams showing the correct angles of each of the servo motors are shown below. Print Settings By continuing to browse this site, you agree to cookies used to optimize the website experience. These may be standard sizes but dont quite me. Custom Computer Panel Emblem, suitable for Tower Desktop with Std. To attach the servo, first rotate the output shaft clockwise as far as it will go; this gives you the min/max position of the servo. Note: Links are for reference only, and are not where I bought my parts. To overcome Corian has certainly had its time in the spotlight. When using batteries to power the robot, it is important to keep track of how much power is left. I tried to make the robot as small as possible, while still leaving enough room for the motors. This function uses the u8g2 display library in page mode; on the Arduino UNO you may get a warning that the memory usage is high, but this warning can be ignored. When starting the sketch and opening the serial monitor, a message should appear after 2-3 seconds, saying that it is ready to calibrate the LOW position of the first servo motor (the head rotation). Ive uploaded all my code onto GitHub; the link is shown below. May the Force be with you!!! Update the on-click parameter with the same numbers: Add the name of the animation, for example, This would give you a line looking like the code below. There are so many fans of Star Wars and a true fan of SW can't have enough Star Wars mounted on the wall. Each of the parts was then individually painted with lacquer spray paints. Some batteries may break if they are over-discharged, and the SD card of the Raspberry Pi may become corrupted if not enough power is delivered. IMPORTANT: Before attaching the servo motors, you need to make sure that the angle of the motor is correct. In 2018 the company reintroduced itself under the new Corian Design brand name, moving from a traditional product-oriented business to a company dedicated to delivering design-oriented solutions that utilize a variety of different surface materials, in addition to other design elements and custom-made solutions, to help clients transform their spaces. If youve always thought your refrigerator needed an accessory that isnt currently offered in the marketplace, this is contest is perfect for you. No support needed. This will be solved by performing the servo motor calibration steps below. If the 12v to 5v DC buck converter is capable of delivering up to 5 amps, then the Raspberry Pi can be directly powered from the converter. Ensure that the correct.
By splattering light layers of black and red paint onto the parts that were painted grey, it was possible to add texture and make them look a lot more like real metal. You can start the print Star Wars Wall Panel With Holes For Buttons. The neck is actuated at two joints, allowing the head to look up/down and to be raised/lowered. connect the computer/phone/tablet you are using to control the robot Here is a PDF of the panel I used; it is already at the correct size, just make sure when sending it to the printer to turn off scaling (print at actual size): The wiring diagram is shown below, illustrating how each of the electronic components were connected in the robot. It is also useful as it makes imperfections and bumps on the part more obvious, showing where further sanding needs to be done. This is a Star Trek Wall Panel scaled for Star Trek Mego action figures. Using a primer is important, as it helps the paint to stick to the plastic and not rub off as easily. From code version 2.7 and onwards, Ive now made it easier to add your own servo motor animations so that you can make your Wall-E do other movements. You can add a new animation by inserting an extra, The time needs to be a number in milliseconds (for example, 3.5 seconds = 3500), The servo motor position commands need to be an integer number between 0 to 100, where. Printer Brand: When all joints are calibrated, the sketch will output an array containing the calibration values to the serial monitor. In the Basic tab you can change the WiFi network name, while the WiFi password can be changed in the Security tab. Create a new script which will be used to start and stop the camera stream: Paste the following code into the script file; you can modify the settings frame rate, quality and resolution to suit the camera you are using: Make sure that the manager script you created has the correct name and is in the correct directory: To make the script executable by the web-server, run this command in the terminal: If you want the camera to automatically startup when you open the web-interface you can change line. Continue reading 3D Printed Terrazzo Floor Tiles. I've another version of this, without the front vain's. However, if you want to move the web-interface files to a different directory on the Raspberry Pi, you will need to change the location where the program will look for the audio files. Overall, the assembly is not too difficult, but it is important to put the parts together in the right order. For finer control, use the characters z and c to move the motor by -1 and +1. I designed all the components in Solidworks, using images and other 3D models as reference. This feature requires the battery level detection circuit in the previous section to be enabled, and the screen will update every time the battery level is calculated. Please shop around to find the best supplier near you! The code is written in Python, and uses Flask to generate a web-server. It can be displayed in any orientation that you want, there's no up or down. Download/clone the folder wall-e_calibration from the, Upload the sketch to the micro-controller, and open the serial monitor and. Open the command line terminal on the Raspberry Pi. The head can look left and right using a servo motor. Following on from my first panel, this one is a more simpler design. The technical storage or access that is used exclusively for statistical purposes. I loved this plate and after I printed one I thought what a great idea for my light switch in my office. Its aimed at developing innovations and products that can be placed inside of the refrigerator. Press, Setup the Raspberry Pi to run the latest version of Raspberry Pi OS (Raspbian) Full. If you want to disable a motor for a specific move, you can use -1. I've another version of this, without the front vain's. However, if you want to add encoders you will need to modify my Arduino code in order to support them; an intermediate level of programming knowledge is required! To qualify, designs must be uploaded to firstbuild.com between November 3 and November 23, 2014, at 11:59 p.m. EST. Great for a diorama! this issue and eliminate the need for any external networking equipment, The technical storage or access is necessary for the legitimate purpose of storing preferences that are not requested by the subscriber or user. Aectual was founded with a mission to bring design freedom, massive cost reduction, perfect consumer quality and zero waste to market. The video below shows how to assemble the robot. The paint that isnt wiped away stays in the corners and crevices of the parts, making the overall replica look older and more realistic. To provisionally fill the space (as seen in my images of the robot), I printed out a picture of the panel on some gloss photo paper and taped it into the space. Send the character a and d to move the motor backwards and forwards by -10 and +10. The main aim in the design process was to split the robot into small enough pieces so that they would fit into the 3D printer, and also to integrate all the motors and electronic components. GE Firstbuild, a partnership between of Louisville-based GE Appliances (NYSE: GE) and Local Motors, is collaborating with 3-D printing company MakerBot, part of Stratasys Ltd. (Nasdaq: SSYS), on the challenge. To use the battery level detection feature on the Arduino, connect the following resistors and wiring as shown in the image below. Plano-convex lens for the eyes (between 31.5-32.5mm) x2. Copy this file into the startup directory using the command: To enable auto-start, use the following command: The web interface should now automatically start when the Raspberry Pi is turned on. Upload the sketch to the micro-controller. Download/clone the folder wall-e from the, To get all the files from the repository, click on the green, To upload the code to the Arduino, you need to download the, Go to Sketch -> Include Library -> Manage Libraries, Connect to the computer to the micro-controller with a USB cable. At this stage, the servos may try to move further than they should and may look uncoordinated. In the code I added a velocity controller, so that the servo motors dont suddenly jump into life at full speed, but instead start and stop gently. It will move on to the HIGH position of the same servo, after which the process will repeat for each of the 7 servos in the robot. The standard LOW and HIGH positions of each of the servos is shown in the images below. You can also manually start and stop the service using the commands: Make sure that all the sound files you want to use are of type. To set up the WiFi hotspot, we will use the RaspAP project which takes care of all the configuration and tools to get the system working. directly to this network. Design up this 'panel' based on Star Wars theme. It can be displayed in any orientation that you want, there's no up or down. . Design up this 'panel' based on Star Wars theme. The recommended resistor values are. Enjoy!!! Ensure that the wiring of the electronics matches the circuit diagram. FirstBuild engineers already have designed test prints that include a 3-D printed pizza box holder and a motorized 3-D printed wine chiller. The Pi is also supports a USB webcam and a speaker, and can play sound effects. https://www.facebook.com/groups/762817337537667/
The trickiest part was probably the wiring, figuring out how to connect the motors in the eyes of the robot to the controller in the body. 3D print testing, online community voting and judging will occur from November 27 to December 2, with the winner announced December 15. To control the movement of the robot, send the characters w, a, s or d to move forward, left, back or right respectively. Wall decoration panel with Four Star motif, can be used for carving work on CNC Router machines and other uses such as 3D printers. The Imperial Sign is a perfect image to produce a nice soap dish so lets start to dress up the sink with Dark Side tools! The tank treads (skid steering) are fully 3D printed and can be powered using two 12V DC geared motors. Powered by STLFinder search engine. Finally, after fully assembling the robot, I used black and brown acrylic paints to weather the robot. To add your own animations, simply copy/paste an extra line to the bottom of the list, changing the following items: Insert the number of the CASE statement relating to the animation, for example, Insert the length of the entire animation in seconds, for example. The programming of the robot can be split into two main parts; the code for the Arduino micro-controller, and the web-server on the Raspberry Pi. Without a subpoena, voluntary compliance on the part of your Internet Service Provider, or additional records from a third party, information stored or retrieved for this purpose alone cannot usually be used to identify you. While a couple of small parts needs to be glued together, most parts are fastened together using bolts. Diagrams showing the correct angles of each of the servo motors are shown below. Print Settings By continuing to browse this site, you agree to cookies used to optimize the website experience. These may be standard sizes but dont quite me. Custom Computer Panel Emblem, suitable for Tower Desktop with Std. To attach the servo, first rotate the output shaft clockwise as far as it will go; this gives you the min/max position of the servo. Note: Links are for reference only, and are not where I bought my parts. To overcome Corian has certainly had its time in the spotlight. When using batteries to power the robot, it is important to keep track of how much power is left. I tried to make the robot as small as possible, while still leaving enough room for the motors. This function uses the u8g2 display library in page mode; on the Arduino UNO you may get a warning that the memory usage is high, but this warning can be ignored. When starting the sketch and opening the serial monitor, a message should appear after 2-3 seconds, saying that it is ready to calibrate the LOW position of the first servo motor (the head rotation). Ive uploaded all my code onto GitHub; the link is shown below. May the Force be with you!!! Update the on-click parameter with the same numbers: Add the name of the animation, for example, This would give you a line looking like the code below. There are so many fans of Star Wars and a true fan of SW can't have enough Star Wars mounted on the wall. Each of the parts was then individually painted with lacquer spray paints. Some batteries may break if they are over-discharged, and the SD card of the Raspberry Pi may become corrupted if not enough power is delivered. IMPORTANT: Before attaching the servo motors, you need to make sure that the angle of the motor is correct. In 2018 the company reintroduced itself under the new Corian Design brand name, moving from a traditional product-oriented business to a company dedicated to delivering design-oriented solutions that utilize a variety of different surface materials, in addition to other design elements and custom-made solutions, to help clients transform their spaces. If youve always thought your refrigerator needed an accessory that isnt currently offered in the marketplace, this is contest is perfect for you. No support needed. This will be solved by performing the servo motor calibration steps below. If the 12v to 5v DC buck converter is capable of delivering up to 5 amps, then the Raspberry Pi can be directly powered from the converter. Ensure that the correct.
Sitemap 33