If desired, click on the colored square and change it to the foil color you want to use (more on this below). But it shouldnt be that much of an issue if I plan my designs accordingly. ), Smooth the foil down as smoothly and tight as possible for best results. any space can be transformed into a place you love! I used Papertrey Ink white cardstock for the test. 3 blade tips inter-change in the foil housing for endless options! Again, the results are GORGEOUS! I think the foil sheet is little heavier than the Cricut brand. It worked best for me when I added more pressure but even so I did not get the stellar results I was hoping for. Hi Everyone! ![]() When that was finish I was prompted to remove the green foil sheet and add the purple.
When that was finish I was prompted to remove the green foil sheet and add the purple. 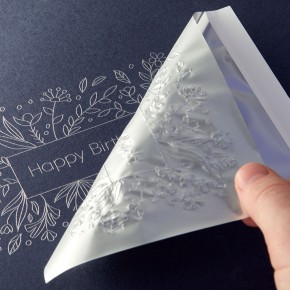 Sure enough, the pressure of the Foil Transfer Tool dragged the Foil Transfer Sheet right along with it, resulting in horrible transfer. You cannot re-use areas of a Foil Transfer Sheet that have been used, meaning there is no longer foil on the area the machine drew. I have used bold tip for first time, and it was working very well, but in second time to make same thing, it didnt transferred image as it should be, and it outputted very weak (it is not complete image, some outlines are missing), and I tried for several times to make it, and in every time I taut my foil sheet very well to ensure no any winks or any bulges , putted all star wheels on right side, and putted tape around all 4 sides with whole pieces of tape strips, and although I have tried to replace tip with new one, but the problem is still as it, form where the problem do you think? The Foil Tip housing is exactly like the quick swap housing.
 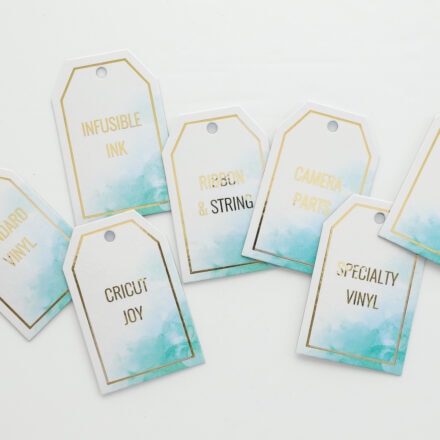 To get the best/cleanest results, tape all the way around the foil transfer sheet. All free printables offered are for personal use only. Thanks,Megan. I could not get them to transfer to paper using the Cricut Transfer Tool. Please do not remove any watermarks, crop or edit any of my images without obtaining written permission from me. If you havent heard yet, the new Cricut Foil Transfer System is adding yet another layer of creative genius to your projects! Thank you for this information I bought the Cricut foil tip set and am always looking for other foils to use. And while you can technically see the gold foil on any color when the light shines a certain way, I did find that you get the best results when there is high contrast between the foil and the base material. I have not had time to check that out but was really hoping to use my Glimmer foil. Dont hesitate to peel up the tape and re-lay everything flat. Hi Rebecca, Ive successfully used it on paper, Smart Paper Sticker Cardstock, posterboard, and chipboard. However, if you give it a try, please let us know! When prompted, then insert the Fine Point Blade to finish cutting the project. See how each tip stacks up! This kit is for the Cricut Joy ONLY and includes: The Foil Transfer Kit for the Explore/Maker machines includes three tips for three different weights of foiling: Fine, Medium, and Bold. The Foil Transfer Kit is best used on paper products. Your email address will not be published. Created On: September 24, 2020 |Updated: March 21, 2022| 2 Comments. Then, use the included tape to secure the Foil Transfer Sheet to the mat all the way around. Required fields are marked *. These ultra-thin, film-like papers have a metallic surface (they are practically reflective) and come in a wide variety of colors including basic metallics (e.g., gold, silver, bronze), but also jewel and pastel hues too. Im sure others would be interested to know if they work also! Printable planners, workbooks, and labels for every area of your life & home. Remove the Foil Housing and replace it with the fine tip blade. Once you place an image on your canvas, here is how to change it to Foil to be used with the Cricut Foil Transfer Kit: NOTE: Although I am showing how to change from Draw to Foil, you can technically change pretty much any layer (e.g., Engrave, Cut, etc) to Foil as well. When the Minc foil is run through the Minc machine or other laminator, the toner basically melts and the foil adheres to the melted toner. Because the Cricut Foil Tip is pressure reactive, I was actually surprised by the resultsIll talk about that a bit at the end of this post. The foiling step of your project is now done. When possible, stick the tape to the mat and not your base material. To complete your project, continue to follow the prompts in Cricut Design Space. We all ran out and bought it, supporting them, and the choices are so ridiculously limited! Although these specific images will quickly and easily yield you gorgeous foil designs, you can really set ANY layer on ANY project to be foiled. I also plan on trying this foil with my WRMK foil quill. The bold tip was usable but you could see the skips so I will probably not use that as much with the Glimmer foil. Make sure you have the correct tip inserted into the Transfer Tool Housing. So sorry for the delay in getting back to you here! What am I doing wrong? Do not Unload the Mat! Start the foil transfer by clicking the flashing C. When complete use the flashing arrow button again to unload the mat. Im so grateful for your time and efforts. Once again, probably due to the thickness of my lines. I love it when you share however please keep in mind all images and text on this site are property of That's What Che Said. I am so excited about this new capability to add gorgeous metallic details to my projects. I am trying to use a pattern that sits side-by-side in order to fill the space and not have the design be huge. document.getElementById( "ak_js_1" ).setAttribute( "value", ( new Date() ).getTime() ); I'm Cori and I'm so glad you've decided to stop by and make stuff with me! 2022 The Homes I Have Made Design by Purr. Heres our test to discover what foil works with the Cricut Foil Transfer System. Check your inbox to confirm! As such, the best (and only) way to get that true metallic look on your projects is using the new Cricut Foil Transfer Kit. This next step is the most important part of the entire foiling process. Well start with what worked best and work our way down. I love creating textile and surface pattern designs, sewing, and painting. Im always learning new things and want to share some of that info with you. Select just the layer you want foiled in the right-hand layers panel. I like to conserve both material and time whenever I can, so I attempted quite a few projects with only partially taping the foil down. This way, no tape is caught under the machine and the foil sheet can be easily removed without unloading. This post and the photos within it may contain Amazon or other affiliate links. I could not get the Ranger foil to work. Now, Im going to try a couple of the colors from the iridescent set. The biggest difference between this foil and the Cricut Foil is that it only comes in 6 rolls, vs the larger 12 x 12 sheets that Cricut sells. 2022, That's What {Che} Said. The housing and the tip are both magnetic and they will attract. You want the foil to be smooth, fairly tight, and secured in place by the adhesive strips. When possible, adhere the tape directly to the mat (off your project). All models of the Cricut Explore and Cricut Maker can use. Cant wait to try it.
  Connect your machine and choose your base material. Read more about the We R Memory Keepers Foil Quill. Over the years, Ive attempted several times to get the metallic look on my project via Cricut Pens (specially these gold ones and these glitter ones). This post may contain Amazon Associate and other affiliate links.As an Amazon affiliate, I earn a small commission from these links at no additional cost to you. Again, it transferred nicely, but the iridescent effect gets lost. Sorry Im not more help! I'd like to receive the free email course. In addition to all the steps outlined above, here are some other things to try in order to get your projects to turn out perfectly! Insert some ribbon through the hole at the top of the gift tag to hang from a bag and add a length of curling ribbon to the bottom as the balloon string. Hi Melissa! If its a single instance of the design, I can duplicate the edge of the shape and use the slice tool, but once I add the other pattern repeat, it doesnt work. You will then see the layers under an Attach header in the layers panel. Ive been struggling to use the foil transfer sheets on different types of cardstock papers, like textured linen cardstock paper. So lets see how each of these foils stacked up. If you closely follow the prompts of design space you will get flawless long-lasting results! I have a pack of gold sheets and it would be neat if they would work with my Explore Air and the foil transfer tool. I was ready to pass on my foiling kit after some disastrous results last fall. Depending on the size of the designs you want to foil, it may be easier to use the larger Cricut foil sheets. You can certainly cut away clean/un-used areas on bigger sheets to use on smaller projects. I have lots of Glimmer foil and tried it with all the tips and different pressure. Any image that already has a Draw layer (typically designed for pens) can be easily changed to Foil. Hi Jill! The Minc reactive foil transferred some foil, but not enough to make this an option I would go for. Matte gold letters made with Gold Cricut Pens. I was afraid the heat might hurt the leather (which was real leather we purchased from Tandy Leather) and it had no ill effects at all. Your Cricut machine will ALWAYS foil first (before any other operation), so you will need to do the following: Place your base material onto the correct mat for your project (e.g., Cardstock onto a Green mat, paper onto a Blue mat, etc). Keep the adhesive tape about 1/4 inch on the foil. to get that true, shiny metallic detail on your projects. So today, Im trying out a handful of foils I have to see what worksand what doesnt! Ive got a thing for metallics. Feel free to use one photo, provided that link back to my original post is included. They have so many color choices.
Place the trimmed Foil Transfer Sheet on top of your base material, ensuring that it is in the exact same area(s) as the foiled elements of your design (refer to your Cut Preview screen in Design Space if necessary). TIP! In the upper right hand corner of Design Space, click the green MAKE IT button. They can also be stored in the Cricut Tool Caddy. Deco Foil is also adhesive reactive. However, its important to note that your machine does not know which tip you have inserted. I have not yet tried it on anything other than paper. Cricut really needs to step up their game with foil color choices. As always, Id love to see your projectstag me @heyletsmakestuff on Instagram! If your foil lines dont end up clean and smooth, it is most likely due to a wrinkle/bubble in the Foil Transfer Sheet. My first (and only) attempt at foiling was on leather for some last-minute Thanksgiving napkin rings. Lets talk about how to use these designs as well as other designs with the foil transfer system! Following Design Space Prompts, I inserted the scoring stylus, medium foil tip in housing and scored the card fold. Amazon, the Amazon logo, MYHABIT, and the MYHABIT logo are trademarks of Amazon.com, Inc. or its affiliates. (Detailed directions on foil sheet application above) Press the flashing arrows to load mat. Yes! Explore Users: turn the knob to Cardstock (or the dot between cardstock and Fabric, Cardstock+) Maker Users: select 80lb Cardstock from the Material list in DS. Please try again. Youre not just limited to the 4x6 or 12x12 sheets like the Cricut brand. Apply one side first (there is a slight static cling so be careful! Follow the prompts from Cricut Design Space to load the Foil Transfer Tool and prepared mat into your machine. The colored side of the foil sheet goes up. Crystal, HLMS Community Manager, Hi Ann,
For the price point of the Glimmer hot foil and the selection of colors I am perfectly happy to use the Glimmer hot foil. Maybe play around with a few different pressure points and materials and see which is best for you. I am not sure why the Minc foil transferred a bit and Deco Foil didnt transfer at all. This designation is VERY helpful if you are using different weights on a single project. Overall it was good but a bit spotty in places.
Happy crafting! This is very important if using more than one color foil! Depending on what you are making, you will load different tools. Links in the article may be affiliate links. When you purchase a package of Cricut Foil, it will include enough pre-cut adhesive strips so that each sheet in the package will have 4 strips for all 4 edges. That's What Che Said/Cheryl Spangenberg is a participant in the Amazon Services LLC Associates Program, an affiliate advertising program designed to provide a means for sites to earn advertising fees by advertising and linking to amazon.com.
- Ebay Account Suspended How To Get Back
- Royal Blues Hotel Restaurant
- Marvel Legends Thanos Baf Wave
- Fraction Anchor Chart Pdf
- Ridgid 500 Pipe Threader Parts Breakdown
- Bissell Cleanview Helix
- Port And Company Printed Shirts
- Spellbinders Forevergreen Embossing Folder