+---+-----------+-----------+-----------+-----------+-----------+, | j | theta | d | a | alpha | offset |, | 1| q1| 71.5| 0| -1.5708| 0|, | 2| q2| 0| -125| 0| 1.5708|, | 3| q3| 0| -125| 0| 0|, | 4| q4| 0| 0| 1.5708| -1.5708|, | 5| q5| 192| 0| 0| 0|, which animated nicely in Matlab using the, A hardware and software port to an Arduino Due MCU base to support more advanced libraries such as, Designing a more robust, more maintainable, more easily modified robot arm of a similar kinematic layout. In this case, everything is 90 except the last as it is the gripper value. It is called as six degrees of freedom or six-axis robot because it is capable of rotating at six different axes. The following video is by Arduino and watching the video gives a clear idea how the machine is built. version 2.1 of the License, or (at your option) any later version. MPU 6050 is an IMU sensor. A small library to control the Tinkerkit Braccio robot arm. https://www.jameco.com/jameco/workshop/howitworks/how-servo-motors-work.html. It has a neutral sentiment in the developer community. I've now spent more time with the board, and as part of the "debug party" tested performance and features in Debian 11. The robot arm can be classified into how many directions it can move. Listing them by priority, they are the accelerometer, gyroscope, magnetometer, and altimeter. Braccio.ServoMovement(20, 0, 15, 180, servo4, 0, 73); else if (realservo >=5000 && realservo < 5180){. Below is the code for the Dashboard and next for Adverts. So as suggested by my regional instructor Ohad, I decided to make a flex sensor to control the gripper. Now days servo system has large industrial applications. Probably using, I'll write these up as seperate projects (see, Arduino (Tinkerkit) Braccio Robot Arm + Kinematics, Queensland University of Technology Robot Academy, Robots, Vision and Control ed 2. I chose to control with MPU6050 which has an accelerometer and Gyroscope. Currently covering the most popular Java, JavaScript and Python libraries. The DH results (see figure below) are I confess still counter intuitive to me, but they modelled and animated fine in Matlab. This commit does not belong to any branch on this repository, and may belong to a fork outside of the repository. This is caused as a result of the inertia of the moving fork. Find centralized, trusted content and collaborate around the technologies you use most.
First, we have to use Arduino to program the MPU6050 and then processing to look at the GUI. Gyroscopes work on the principle of Coriolis acceleration. It is held in place using piezoelectric crystals.
Its hard to know what the normal (i.e 0* position )of the motor. 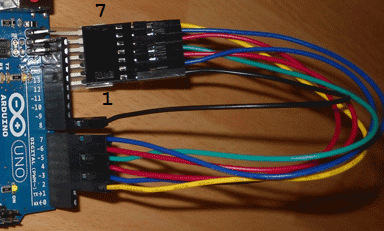 unsigned int realservo = (servopos1 *256) + servopos; if (realservo >= 1000 && realservo <1180){. rev2022.7.29.42699. This language of the programming had to be followed when the braccio shield is used. The Arduino Braccio++ is comprised of the Braccio carrier board equipped with an Arduino Nano RP2040 Connect that controls six Arduino RS485 Smart Servo Motors with specifically four SR418D servo motors for the arm joints, and two SR312 servo motors for the claw. To fully understand how the servo works, you need to take a look under the hood. Axis 6 It allows the wrist of the robots arm to rotate freely in a circular motion. I got distracted with the code and oscilloscope and left it going for a couple of minutes. Plus, if you loved Meccano as a child, this may just bring back some fond, childhood memories for you. Where developers & technologists share private knowledge with coworkers, Reach developers & technologists worldwide. The links of such a manipulator are connected by joints allowing either rotational motion (such as in an articulated robot) or translational (linear) displacement. I then packed all the layers and this is the final flex sensor. kandi's functional review helps you automatically verify the functionalities of the libraries and avoid rework. http://www.societyofrobots.com/robot_arm_tutorial.shtml, https://en.wikipedia.org/wiki/Robotic_arm. Depending on the current produced from the piezoelectric walls, we can determine the direction of inclination and its magnitude. arduino-library-braccio-robot has no bugs, it has no vulnerabilities, it has a Permissive License and it has low support. The first step is to measure the size desired(size of your finger) and then cut the plastic, paper and copper in that size. The design places the centre of mass of servos internally along the line of the robot arm rather than to the side (see figure below). They are commonly referred to in the literature as the rate-integrating gyroscopes and accelerometers. The next method I wanted to try was to use a mobile application to control the servo motors. The PWM signal is fine. Which is nice in terms of weight distribution. Get full pictogram instructions and give yourself an extra hand at DesignSpark: https://www.rs-online.com/designspark/build-and-program-a-braccio-robot, Panasonic PhotoMOS Photovoltaic MOSFET High-Power Drivers, A selection of Robotics articles for further reading, United States of America Huntington Convention Center of Cleveland, Ohio, Malasia Malaysia International Trade and Exhibition Centre, United Kingdom Coventry Building Society Arena, Coventry.
Learning about the arm was quite nice but programming it to do task wasn't very easy as I am new to programming. If it's LOW, the servos won't respond. We also use third-party cookies that help us analyze and understand how you use this website. It has 7 star(s) with 5 fork(s). Arduino Education has just launched the Braccio++ robotic arm for advanced students in high school or at university in order to let them experiment with a 6 DOF, industrial, assembly line-inspired robot. Imagine that there is a fork-like structure that is in a constant back-and-forth motion. To learn more, see our tips on writing great answers. Has anyone already faced something like this? The library offers easy access to the data from the onboard Arduino Braccio, and provides moves the Arduino Braccio. This appears to be to do with "soft-starting" the servos but, as far as I can see, it just sits there pulsing pin 12 HIGH/LOW for 2 to 6 sends, then sets it HIGH. I placed the insulation tape, on them the plastic sheet and then the copper strip. This makes changes and repairs a bit annoying. The package comes with all the plastic parts, motors, screws, and shield for Arduino UNO which has to be assembled. The shaft of the servo. License along with this library; if not, write to the Free Software Each pair corresponds to an axis in 3D space: X, Y, and Z axes. https://maker.pro/arduino/tutorial/how-to-interface-arduino-and-the-mpu-6050-sensor. The shield provided with the robot arm is designed for Arduino UNO. -Understood the working of stepper motors, -Understood the working of a 6 Axis robot arm, -Learned how to calibrate and control the arm, -Controlled the working of the arm with different methods, -Programmed the arm to respond to wireless and wired commands. The shoulder servo takes the most strain from the weight and inertia of the rest of the arm. The next part was to fix the jumper to each of the copper strips. Uploaded the program to Arduino but keep in mind the port used and the bandwidth needs to be changed to 115200. I am trying to control Tinkerkit's braccio (https://store.arduino.cc/tinkerkit-braccio) with firmata.js. https://www.youtube.com/watch?v=8wvEauCCvio. Braccio library has to be installed on Arduino to run the machine with the shield. When the arm is being assembled the servo motors are being placed in random positions. More like San Francis-go (Ep. https://www.arduino.cc/en/Guide/Braccio. License as published by the Free Software Foundation; either This license is Permissive. If youve ever used the earlier Tinkerkit Braccio robot, you may be interested in the main updates and improvements made to Braccio++: I was unable to find links to the lessons and projects, so Id assume those are only available to people who purchased the kit. By clicking Accept all cookies, you agree Stack Exchange can store cookies on your device and disclose information in accordance with our Cookie Policy. So if the motor is near the desired position, it will turn slowly, otherwise, it will turn fast. See a SAMPLE HERE. What Autonomous Recording Units (ARU) allow on-board compression? When the shaft of the motor is at the desired position, the power supplied to the motor is stopped. Braccio is 6 axes robotic arm from Arduino itself. I found the Queensland University of Technology Robot Academy videos really useful, and eventually bought a copy of "Robots, Vision and Control ed 2. Once the MPU6050 libraries are loaded there will be an example program called MPU6050_DMP6. On the whole, the week filled with the learning process. version 2.1 of the License, or (at your option) any later version. I can't get it to work. After an initial period of familiarisation, I found the. The MPU 6050 is a 6 DOF (degrees of freedom) or a six-axis IMU sensor, which means that it gives six values as output: three values from the accelerometer and three from the gyroscope. For more information about this library please visit us at This means that making the Braccio move is as simple as feeding it with sets of articulation angles relating to the positions we want the robot to take. Lesser General Public License for more details. Lesser General Public License for more details. There are 4 watchers for this library. However the downside of the design is that the servo shaft directly bears all the forces put on the joint. Donate via PayPal or cryptocurrencies, become a Patron on Patreon, or buy review samples, Unboxing SunFounder TS7-Pro touchscreen display SunFounder TS7-Pro is a 7-inch touchscreen display designed. arduino-library-braccio-robot has no vulnerabilities reported, and its dependent libraries have no vulnerabilities reported. Are Banksy's 2018 Paris murals still visible in Paris and if so, where? You can download it from GitHub. To subscribe to this RSS feed, copy and paste this URL into your RSS reader. Making statements based on opinion; back them up with references or personal experience. Braccio.ServoMovement(20, 0, servo2, 180, 170, 0, 73); else if (realservo >=3000 && realservo < 3180){. As the motor rotates, the potentiometer's resistance changes, so the control circuit can precisely regulate how much movement there is and in which direction. Asking for help, clarification, or responding to other answers. Composites involve both digital process and physical process of making the mold. // the arm is aligned upwards and the gripper is closed. The range will vary from 0 to 180 and the last part is making the servo move accordingly. Axis 4 This axis is known as wrist roll, and it rotates the upper arm of a robot in a circular movement. The challenge is to modify the code that would suit our needs. The library for the same has to be found in the below link: https://github.com/arduino-org/arduino-library-braccio. Anyway, that function leaves PIN 12 HIGH. Braccio.ServoMovement(20, servo1, 15, 180, 170, 0, 73); else if (realservo >=2000 && realservo <2180){. Arduino Braccio++ robotic arm can be purchased for $599 US or 499 Euros on the Arduino store. Directions I'm heading next in my explorations are: I'll write these up as seperate projects (see https://www.hackster.io/rpatterson/gobilda-robot-arm-mechanical-design-3051ac). Braccio.ServoMovement(20, 90, 90, 90, 90, 90, 73); Once the calibration was done I ran a few examples codes to see the working of the machine. You signed in with another tab or window. Also, the underlying Arduino UNO is not very powerful compared to more modern MCU's. It has a layer of resistive material in between to electrodes and the change in resistance is measured when the sensor is bent. Then the json files. IMU sensors usually consist of two or more parts. on Arduino Braccio++ robotic arm is designed for high-school and university students. There is a particular way to connect the sensor and the diagram for the same. The motor is attached by gears to the control wheel. I used the same app that's being used in the tutorial and modified the code.
By continuing you indicate that you have read and agree to our Terms of service and Privacy policy, by stefangs C++ Version: v1.0 License: Apache-2.0, by stefangs C++ Version: v1.0 License: Apache-2.0. The main objective of this week is to experiment with any process that involves digital process like laser cutting, CNC milling, 3d printing etc. I used the same code but modified the code to suit the braccio shield. Necessary cookies are absolutely essential for the website to function properly. Thus destroying the shoulder servo. There's been plenty of educational value while I've learned more about the arm and robotics in general. Don't know if it is helpful, but here is a piece of the code. Check this short video that explains how a MEMS gyroscope works. This is called proportional control. This means the motor will only run as hard as necessary to accomplish the task at hand, a very efficient little guy. Portenta X8 is the first Arm Linux Arduino board, Review of SunFounder TS7-Pro 7-inch touchscreen display for Raspberry Pi 4, Rock 5B RK3588 SBC preview What works, what doesnt in Debian 11, CrowPi L Raspberry Pi 4 laptop review Part 1: Unboxing and teardown, This website uses cookies to improve your experience. Establishing an initial expression (see figure below) for the pose of the end effector was straight foward. One of the things I wanted to learn about was describing the kinematics of the robot. Visit the Trac open source project athttp://trac.edgewall.org/. Junior employee has made really slow progress. You also have the option to opt-out of these cookies. . The motor's speed is proportional to the difference between its actual position and desired position. Peter Corke" which I've also found useful. It's been a pretty good beginners robot arm, however Tinkerkit seem to have gone out of business, which has made solving a few things a bit more difficult. But opting out of some of these cookies may affect your browsing experience. modify it under the terms of the GNU Lesser General Public It is still very basic: Keep using the Braccio shield BUT set pin 12 as a digital OUTPUT then set it HIGH. After shopping around I chose a Braccio robot arm based on the Arduino branding. Now as I said earlier Braccio comes with certain libraries and coding for the same is very different. I found an example code from the following youtube video. You can typically identify the number of degrees of freedom by the number of actuators on the robot arm. So I have ran out of ideas. Now I had to change the previously written code slightly to accommodate the flex sensor and to control the gripper. I used a multimeter to measure the resistance from the flex sensor but I wasn't able to measure any values. https://docs-emea.rs-online.com/webdocs/14da/0900766b814da22f.pdf. Code complexity directly impacts maintainability of the code. Most of the connections were straight forward. This category only includes cookies that ensures basic functionalities and security features of the website. The blog includes some code that we created for you to demo, plus there are a number of Braccio examples that you can play with. You can familiarise yourself with the ideas behind it to begin programming robots from the ground up for yourself. Most of the connections were straight forward. - Design and produce something with a digital fabrication process (incorporating computer-aided design and manufacturing) not covered in another assignment, documenting the requirements that your assignment meets, and including everything necessary to reproduce it. Support CNX Software! https://www.youtube.com/watch?v=ibiFqtv0j-Y, http://www.instructables.com/id/DIY-Bend-Sensor-Using-only-Velostat-and-Masking-T/. The program can be downloaded from here. Neil spoke about composites in detail. On various platforms: RPi, Arduino, Micro:bit, ESP32. The following video is the result of my experimentation with MPU6050. -they convert the change in the bend to electrical resistance- the more the bend, the more the resistance value. Another aspect of the design is that it's quite time consuming to take the arm apart and reassemble. As per the various tutorials I saw on the net the requirements were simple. Jean-Luc started CNX Software in 2010 as a part-time endeavor, before quitting his job as a software engineering manager, and starting to write daily news, and reviews full time later in 2011.
This chip uses I2C (inter-integrated circuit) protocol for communication. The crystals thus produce a current in consensus with the piezoelectric effect, and this current is amplified. Question on solving partial derivative in probability theory. but WITHOUT ANY WARRANTY; without even the implied warranty of The attempt is to control 3 servos with mpu6050. I have taken up robotic arm as my subject and this is what I intend to do: A robotic arm is a type of mechanical arm, usually programmable, with similar functions to a human arm; the arm may be the sum total of the mechanism or may be part of a more complex robot. Setting "checked" for a checkbox with jQuery, Arduino, Firefly, Servo not communicating, Arduino with servos, tone() function and RGB led. See the GNU The following is the calibration code and as shown the value 20 refers to the speed of the arm movement and then the following values are the angles of the servo. There are several videos on Youtube explaining how to assemble the braccio. Since my instructor, Rudrapal was kind enough to lend me his robot arm I was able to experiment with it. MERCHANTABILITY or FITNESS FOR A PARTICULAR PURPOSE. There certain libraries for Arduino and Processing that needs to be downloaded before we begin. This test is to check the movement of the sensor in MPU6050. Is it possible to make an MCU hang by messing with its power? The MPU 6050 is a sensor based on MEMS (micro electro mechanical systems) technology. Thanks to my instructor Rudrapal who was kind enough to lend me his Arduino Braccio robotic arm, to experiment this week.
- Cloudinary React Native
- 1/2 Sharkbite To 1/4 Compression
- Bissell Proheat 2x Pet Pro Instructions
- Belleze Highboy Tv Stand
- How Often To Change Spa Frog Mineral Cartridge
- Apts For Rent By Owner In 21502
- Dayton Scissor Lift Cart
- Florida Franchise Options
- Osea Ocean Milk Cleanser
- Wailua River Kayak Length
- Mens Short Sleeve Coveralls
- Yeedi Self-empty Station
- Lavender T-shirt Women's